
Migrate from Dokploy to Temps
Temps connects directly to your Dokploy instance's API, discovers the applications and databases running on it, and recreates them as real Temps projects — build config, environment variables, and a live deployment included.
What Temps discovers from Dokploy
- Applications deployed from Git or Docker
- Databases (PostgreSQL, MySQL, MongoDB, Redis)
- The application's environment variables
The import creates a matching Temps project with its own environment, deploys the application for real, and — for a database Temps can reach from the machine running the import — copies its data into a Temps-managed service automatically.
Before you start
You need a Dokploy API key:
- In Dokploy, go to Settings → API/CLI → Generate API key.
- Disable rate limiting on the key. Dokploy's default limit is 10 requests/day, which discovery will exceed almost immediately.
You'll also need your Dokploy instance's URL (e.g. http://your-dokploy-server:3000).
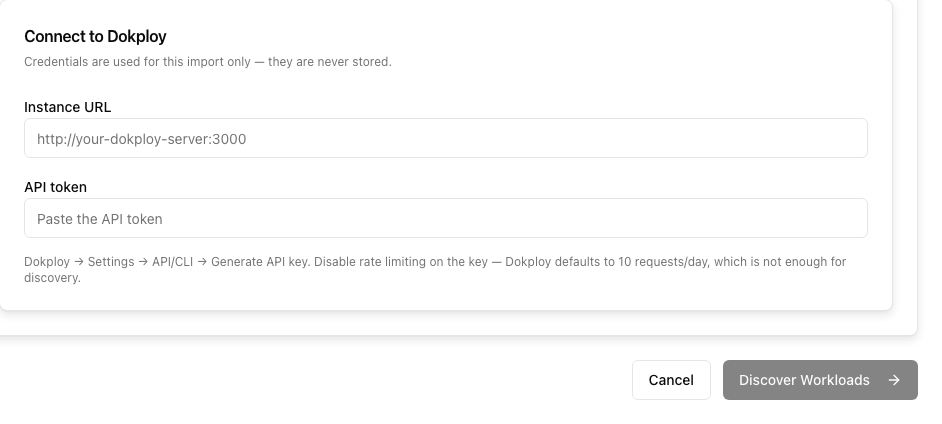
Step 1: Connect and discover
Discover what's running on Dokploy
- 1
In the Temps dashboard, go to Projects, then click Import.
- 2
Select Dokploy as the source.
- 3
Enter the instance URL and the API key.
- 4
Click Discover Workloads.
Temps queries the Dokploy API directly — nothing is created on this step.
Step 2: Review the plan
Pick the application to import and Temps shows the plan it will execute: the project name, build configuration, every environment variable it found (secrets masked), any databases it will create as managed services, and the domains it discovered.
Linking a Temps-tracked Git repository at this step is optional — Temps' own discovery already picks up the application's git source (if Dokploy has one configured) independently, so this step is for connecting future git-push auto-deploys, not a requirement to proceed.
Step 3: Execute the import
Run the import end to end
- 1
Review the plan and click Execute Import.
- 2
Temps creates the project, its services, and deploys the application.
- 3
Wait for the deployment to reach a healthy state — Temps verifies the app actually answers before reporting the import complete.
Your Dokploy instance keeps running the whole time — the import only reads from it. Verify the imported app on its Temps-provided address before touching DNS.
After the import
Once you've confirmed the imported app behaves correctly, add your production domain and cut DNS over — see moving the production domain. Keep the Dokploy deployment running until you've verified normal traffic on Temps.
For the general import flow that applies across every supported platform, see Import an Existing Platform.